Fuel injector as name suggest, is the main component of the fuel injection system. The fuel pumped by the fuel pump, reaches the injector, and from here to the combustion spaces. The minute particles of fuel are made by this piece.
The spring setting is according to the manufacturer, at which the proper amount of fuel and atomization takes
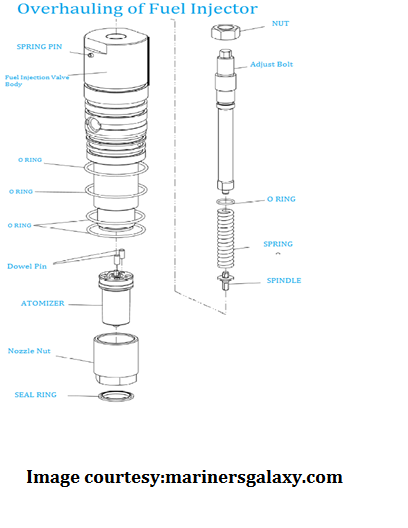
place. Like all other machineries, it needs to be overhauled from time to time, to make sure that it works properly. Pictorial representation of how fuel injector looks like is also given.
Step by Step Fuel Injector Overhaul Procedure
Either you are overhauling the F.I of the main engine or generator engine; more or less the procedure remains the same.
1) Remove the fuel injector from the unit. And after that, cover the hole, with some cloth, so that nothing goes inside the unit.
Below are the parts of fuel injector
2) Put injector in bucket and take it to the workshop.
3) Do the pressure test first, on the equipment provided on board. If it is satisfactory, then no need to overhaul it. In particular ship, opening pressure was 400 bar. If not, follow the below steps.
Below is the picture of injector lying after overhaul
4) Fix it in the vice to open the union nut in M.E injector and locking nut in case of auxiliary generators.
5) Now turn the injector and slacken nozzle holding nut. For M.E, there is no such thing. As soon as you remove the union nut, you can take out the whole assembly.
6) Remove nozzle and keep it safe, as this is the most important component of it.
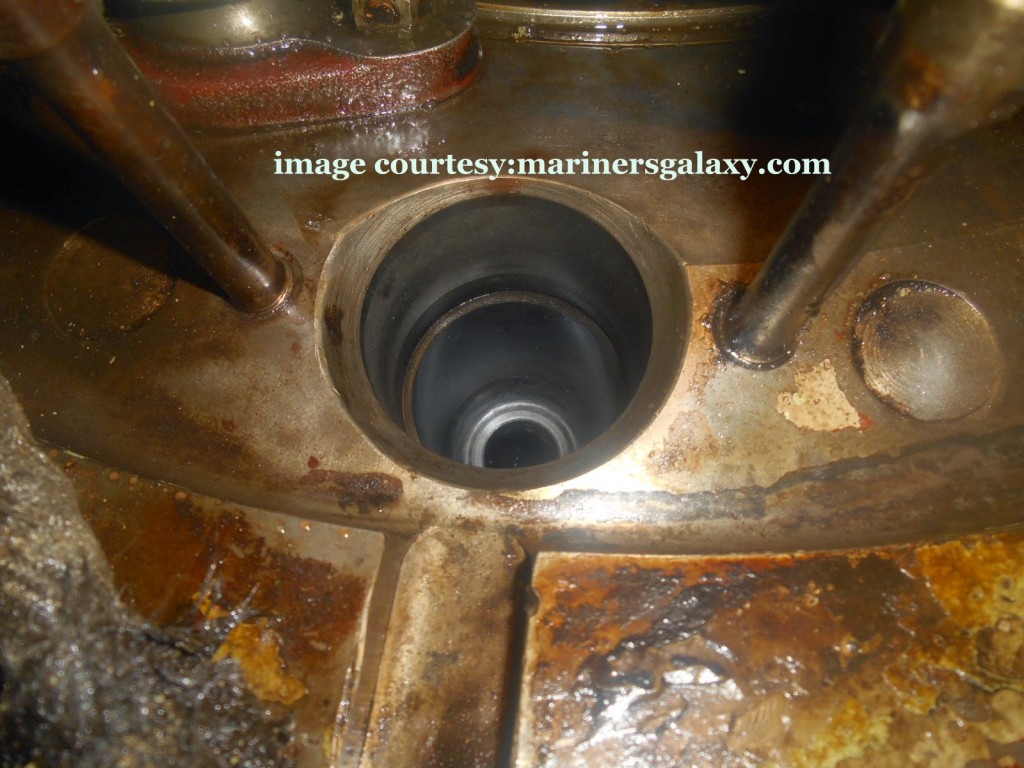
Cleaning the injector sitting surface on cylinder head
7) Take out the intermediate spindle, needle valve. For M.E injectors Non-Return Valve, Thrust Spindle Parts, Thrust Foot, Spindle Guide and Fuel Nozzle are the main parts.
8) Put all of these in clean diesel, this helps in removing any black HFO sticking to the surface.
9) Lapping of needle valve and nozzle sealing face needs to be done as per the requirement.
10) In the nozzle Clean holes, check with go-no go gauge. If no go gauge gives positive reading, it’s time to change the nozzle assembly (this is the costliest part).
11) Assemble all the parts and Pressure test it.
12) In A.E injector we have spring tensioning nut at the top for changing the pressure setting. But for the
M.E, we have the washers. They are used to increase or decrease the desired pressure.
So this was all in this article. There might be slight change in the way people overhaul the injector, but general approach it this.



some of a good writes that i,ve visit. simple explanation and nice representation. thanks for the info.
i want to learn elaborately explain about car injection travel.